
Welcome to the Coleman RoadTrip Grill manual! This guide helps you assemble, operate, and maintain your portable propane grill, ensuring delicious meals wherever you go;
Overview of Coleman RoadTrip Grill Series
The Coleman RoadTrip Grill Series offers portable, propane-powered grills designed for camping and outdoor cooking, featuring models like the RoadTrip 285, known for their efficiency and durability.
2.1 Features
The Coleman RoadTrip Grill Series boasts impressive features tailored for versatility and convenience. These grills are equipped with high BTU burners, such as the 60,000 BTU output in select models, ensuring efficient cooking. They utilize propane as a fuel source, which is both reliable and easy to use. One standout feature is the Swaptop cooktop system, allowing users to interchange grill grates with griddles or other accessories, expanding culinary possibilities. Additionally, these grills are designed with portability in mind, featuring collapsible designs and compact footprints, making them ideal for camping trips or small outdoor spaces. Durable construction, including stainless steel components, enhances longevity and withstands the rigors of frequent use. The ignition system is manual, providing straightforward operation, while the overall design emphasizes ease of assembly and maintenance.
2.2 Benefits
The Coleman RoadTrip Grill Series offers numerous benefits, making it a versatile and practical choice for outdoor cooking enthusiasts. Its high BTU output ensures rapid heating and consistent cooking results, while the Swaptop cooktop system allows for diverse cooking options, such as grilling, frying, and baking. The portable design makes it ideal for camping, tailgating, or small backyard gatherings, providing a convenient grilling experience on the go. Durable construction, including stainless steel components, ensures longevity and withstands outdoor conditions. The user-friendly manual ignition system simplifies operation, while the compact size saves storage space. These grills are perfect for those seeking a reliable, efficient, and adaptable cooking solution for various settings. Their capability to deliver professional-grade results in a portable format makes them a favorite among campers and home users alike.
Assembly Instructions
Follow the step-by-step guide in the manual to assemble your Coleman RoadTrip Grill. Ensure all parts are unpacked and hardware is organized before starting. Refer to diagrams for clarity.
3.1 Unpacking and Inventory
Begin by carefully unpacking your Coleman RoadTrip Grill to ensure all components are included and undamaged. Check for the grill body, burners, cooking grates, hardware pack, and any additional accessories like the griddle or carrying case. Compare the contents with the parts list provided in the manual to confirm everything is accounted for. Take a moment to organize the hardware, such as bolts, screws, and washers, to avoid confusion during assembly. If any items are missing or damaged, contact Coleman customer support immediately. It’s also a good idea to review the assembly diagrams in the manual before starting to familiarize yourself with the process. Proper organization and verification at this stage will make the assembly process smoother and less frustrating. Ensure all parts are in good condition to guarantee proper functionality and safety.
- Grill body and burners
- Cooking grates and griddle (if included)
- Hardware pack (bolts, screws, etc.)
- Carrying case or stand (if applicable)
- Instruction manual and assembly diagrams
3.2 Hardware Requirements
To assemble your Coleman RoadTrip Grill, ensure you have all the necessary hardware included in the package; Typically, this includes bolts, screws, washers, and clips. Verify the hardware against the parts list in the manual to confirm nothing is missing. Essential tools for assembly may also be required, such as an Allen wrench or screwdriver. If any hardware is missing or damaged, contact Coleman customer support for assistance. Proper hardware is critical for safe and functional assembly. Double-check all components before starting to avoid delays. Ensure all bolts and screws are tightened securely as per the instructions to prevent loose parts during use. If additional tools are needed, they are usually specified in the manual. Always refer to the provided diagrams for clarification on hardware placement and usage. This step ensures a sturdy and reliable setup for your grill.
3.3 Step-by-Step Assembly Guide
Begin by unpacking and organizing all components. Start with the grill base and attach the legs using the provided bolts. Next, secure the handle to the base. Attach the cooking surfaces, ensuring they align properly with the brackets. Install the burners and connect the propane regulator according to the manual. Mount the grill box and lid, making sure all hinges are securely fastened. Attach the wheels and any additional accessories like side tables. Tighten all connections firmly. Finally, perform a safety check by testing the ignition system and ensuring no gas leaks. Refer to the assembly diagrams for visual guidance. If unsure, consult the troubleshooting section for common issues. Once complete, your Coleman RoadTrip Grill is ready for use. Always follow the manual’s instructions for a safe and correct assembly process.
3.4 Assembly Diagrams and Visual Aids
The Coleman RoadTrip Grill manual includes detailed assembly diagrams to guide you through the process. These visuals are located in the manual and are also available online. The diagrams provide a clear, step-by-step breakdown of how to assemble each component, ensuring accuracy and safety. Key visuals include exploded views of the grill’s parts, step-by-step assembly sequences, and images highlighting essential connections like the propane regulator and burner installation;
The diagrams also feature symbols and color-coded components to simplify complex steps. For example, red arrows indicate where bolts should be tightened, while green checkmarks highlight completed stages. Additional visuals show how to attach accessories like griddles and side tables. Referencing these diagrams alongside the written instructions ensures a smooth assembly process. If unsure about a specific step, zoom in on the images for clarity. These visual aids are particularly helpful for first-time users, making the assembly process more intuitive and efficient. Always cross-reference the diagrams with the step-by-step guide for the best results. Ensure your device or printer displays high-resolution images for optimal detail.
Operating the Grill
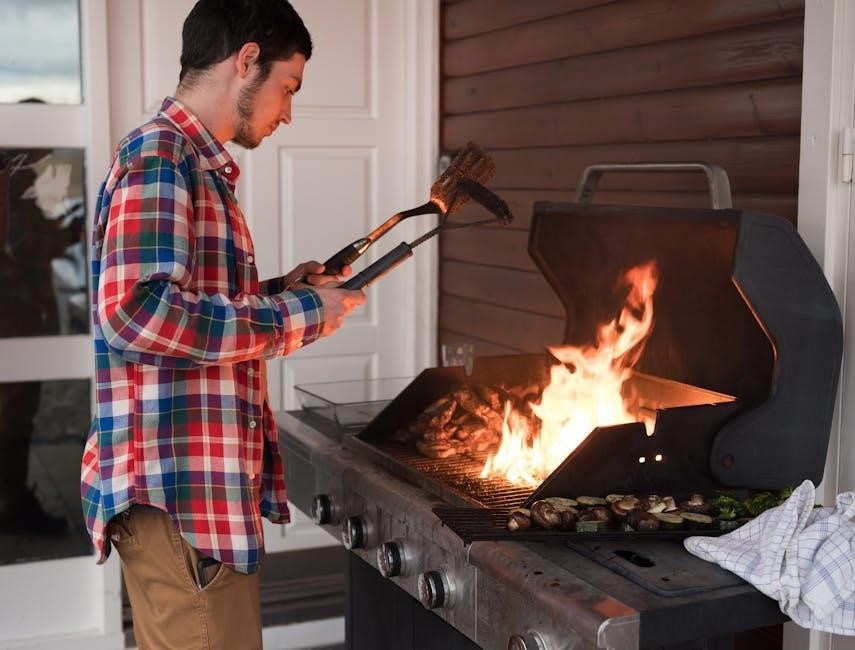
Operating the Coleman RoadTrip Grill involves a manual ignition system, adjustable burners for temperature control, and even heat distribution for consistent cooking results. 60,000 BTU ensures powerful performance.
4.1 Ignition System
The Coleman RoadTrip Grill features a manual ignition system for reliable and easy startup. To light the grill, turn the knob to the “light” position and press the igniter button until the burner clicks. Ensure the propane tank is turned on and the regulator is properly connected. Once lit, adjust the burner knobs to achieve the desired flame level. For safety, always light the grill with the lid open to prevent gas buildup. If the igniter fails, use a long match or lighter to manually light the burners. Keep the area clear of flammable materials and never leave the grill unattended during operation. Proper ignition ensures even heat distribution for consistent cooking results. Always follow the manufacturer’s guidelines for ignition and operation to maintain safety and performance.
4.2 Temperature Control
The Coleman RoadTrip Grill offers precise temperature control through its adjustable burner knobs and built-in thermometer. To achieve optimal cooking results, preheat the grill with the lid closed for 10-15 minutes. Use the burner knobs to regulate the flame height and heat output. The thermometer allows you to monitor the internal temperature, ensuring it stays within your desired range. For even cooking, adjust the burners to create heat zones, enabling tasks like searing and simmering. Avoid overheating by keeping an eye on the temperature gauge. Proper temperature control prevents food from burning and ensures a perfectly cooked meal every time. Always refer to the manufacturer’s guidelines for specific temperature settings and adjustments to maintain consistent performance and safety.
4.3 Cooking Techniques
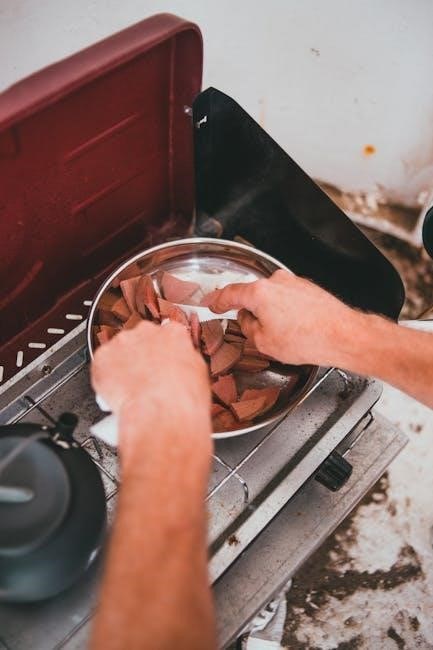
Mastering cooking techniques on your Coleman RoadTrip Grill enhances your grilling experience. Start with preheating the grill to ensure even heat distribution. For direct grilling, place food directly over the flames for a crisp exterior. Indirect grilling is ideal for larger cuts, placing food away from direct heat for slow cooking. Searing is achieved by high heat to lock in juices. Use the adjustable burners to create heat zones for simultaneous searing and simmering. Don’t forget to grease the grates to prevent sticking. For delicate foods like fish or vegetables, consider using a griddle attachment. Always close the lid to retain heat and flavors. Experiment with wood chips for smoky flavors. Proper food preparation, such as seasoning and marinating, elevates your dishes. Practice makes perfect, so explore various methods to achieve your desired results. Happy grilling!

Maintenance and Care
Regular maintenance ensures your Coleman RoadTrip Grill performs optimally. Clean grates and burners after each use, and store the grill in a dry, protected area to prevent rust. Proper care extends its lifespan and reliability for years of enjoyable grilling experiences.
5.1 Cleaning the Grill
Regular cleaning is essential for maintaining your Coleman RoadTrip Grill’s performance and longevity. Start by preheating the grill on medium heat for 5-10 minutes to loosen food residue. Use a wire brush to scrub the grates, removing any debris. For tougher stains, mix mild dish soap with warm water and apply with a soft sponge. Avoid abrasive cleaners or scourers to prevent damage. After cleaning, rinse the grates with water and let them dry. Wipe down the exterior with a damp cloth, removing grease and dirt. Clean the burners and drip pans with a gentle cleaner and a soft brush. Regularly deep clean the grill by removing all components and washing them with soap and water. Proper cleaning ensures optimal grilling results and prevents rust or corrosion. Always wear gloves and ensure the grill is cool before cleaning.
5.2 Storage Tips
Proper storage is crucial to maintain the condition and functionality of your Coleman RoadTrip Grill. Always clean the grill thoroughly before storing it to prevent rust and bacteria growth. Use a grill cover to protect it from dust, moisture, and outdoor elements. Store the grill in a dry, well-ventilated area, such as a garage or shed, away from direct sunlight. If storing for an extended period, disconnect the propane tank and keep it in an upright, secure location. Never store the grill with fuel inside, as this can pose safety risks. For portable models, consider using a carrying case to protect the grill during transport or storage. Regularly inspect the grill and its components before and after storage to ensure everything is in good condition. Proper storage will extend the lifespan of your grill and ensure it remains ready for your next adventure.
5.3 Replacing Parts
Replacing parts on your Coleman RoadTrip Grill is essential for maintaining its performance and longevity. Start by identifying the specific part that needs replacement, such as burners, grates, or igniter components. Refer to your user manual for part numbers and diagrams to ensure accuracy. Genuine Coleman replacement parts are recommended to guarantee compatibility and safety. Once you have the replacement part, turn off the propane supply and allow the grill to cool completely before starting the process. Use the tools provided or basic hand tools to remove the old part and install the new one. For complex replacements, such as the burner or igniter, consult the manual or contact Coleman support for guidance. Regularly inspecting and replacing worn-out parts will keep your grill functioning optimally and prevent potential safety hazards. Always follow safety precautions and manufacturer instructions when handling propane and electrical components.
Troubleshooting Common Issues
Identify common issues like ignition malfunctions or uneven heating. Check propane connections, burner condition, and ignition systems. Refer to the manual for solutions and repair guidance to restore optimal performance.
6.1 Identifying Problems
Identifying issues with your Coleman RoadTrip grill starts with observing its performance; Common problems include a grill that won’t light, uneven heating, or low flame output. Check the propane tank for sufficient fuel and ensure the regulator is functioning properly. If the grill doesn’t ignite, inspect the ignition button or electrode for wear or debris. For uneven heating, examine the burners for blockages or damage. Refer to the user manual for specific troubleshooting steps tailored to your model, such as the Coleman RoadTrip 285. Always follow safety guidelines when diagnosing issues to avoid accidents. By systematically checking each component, you can pinpoint the root cause and apply the appropriate solution.
6.2 Solutions and Repairs
For common issues with your Coleman RoadTrip grill, start by addressing the root cause. If the grill won’t light, clean the ignition system or replace the electrode. Low flame output can be resolved by ensuring the propane tank is full and the regulator is properly connected. For uneven cooking, check and clean the burners to ensure proper gas flow. If the grill overheats, reduce the heat setting or ensure adequate ventilation. Refer to the user manual for specific repair steps, such as replacing worn-out parts like the regulator or burners. Always turn off the propane supply before attempting any repairs. Regular maintenance, like cleaning the grill and inspecting hoses, can prevent many issues. If problems persist, contact Coleman customer support for assistance or replacement parts.

Safety Guidelines
Always follow these guidelines for safe operation of your Coleman RoadTrip Grill. Handle propane with care, ensure proper ventilation, and maintain cleanliness to prevent hazards. Follow manual instructions carefully.
7.1 Propane Safety Precautions
Propane safety is crucial when operating your Coleman RoadTrip Grill. Always handle propane cylinders with care, ensuring they are stored upright and secured in a well-ventilated area. Before use, inspect hoses and connections for leaks using a leak detector or soapy water. Never use an open flame to check for propane leaks. Keep the grill at least 10 feet away from flammable materials and ensure proper ventilation to avoid gas buildup. Follow the manufacturer’s guidelines for ignition and operation. Store propane cylinders in a cool, dry place, away from direct sunlight and heat sources. Never leave the grill unattended while in operation. Always turn off the propane supply at the cylinder when not in use. Adhere to these precautions to ensure safe and enjoyable grilling experiences.
7.2 Proper Ventilation
Proper ventilation is essential for safe and efficient operation of your Coleman RoadTrip Grill. Always use the grill in an open, well-ventilated area to prevent the accumulation of propane fumes and carbon monoxide. Avoid grilling in enclosed spaces such as garages, tents, or under low-hanging branches, as this can create a fire hazard or lead to dangerous gas buildup. Position the grill at least 10 feet away from buildings, flammable materials, or overhanging structures. Ensure that vents on the grill are not blocked and that airflow around the unit is unobstructed. Never leave the grill unattended while in use, and always turn off the propane supply when finished cooking. Proper ventilation not only enhances safety but also ensures optimal performance and even heat distribution during cooking.
7.3 Food Safety Tips
Ensuring food safety while using your Coleman RoadTrip Grill is crucial to prevent foodborne illnesses and enjoy a delicious grilling experience. Always handle raw meat, poultry, and seafood separately from cooked and ready-to-eat foods to avoid cross-contamination. Use a food thermometer to check internal temperatures: 165°F for poultry, 160°F for ground meats, and 145°F for steaks and chops. Never leave perishable foods at room temperature for more than two hours, or one hour if the temperature exceeds 90°F. Marinate foods in the refrigerator, not at room temperature, and always cook marinated foods thoroughly. Keep the grill surface clean to prevent residue and bacteria buildup. Regularly wash hands with soap and water before and after handling food. By following these guidelines, you can ensure a safe and enjoyable grilling experience for everyone.

Accessories and Add-Ons
Enhance your grilling experience with Coleman RoadTrip Grill accessories. Swappable cooktops, griddles, and carrying cases provide versatility and portability for ultimate convenience and performance.
8.1 Swappable Cooktops
Coleman RoadTrip Grill offers swappable cooktops, allowing you to customize your grilling experience. Available options include a griddle, stove grate, and BBQ surface for versatility. These cooktops are designed to be easily interchangeable, enabling you to switch between cooking styles without tools. The griddle is ideal for pancakes and searing vegetables, while the stove grate provides a traditional grill setup. The BBQ surface is perfect for achieving those classic sear marks on your favorite meats. This feature enhances your grilling flexibility, making it suitable for various cooking needs and preferences. Whether you’re cooking for a family gathering or a camping trip, the swappable cooktops ensure your grill adapts to any meal plan.
8.2 Griddles and Accessories
Coleman RoadTrip Griddles and Accessories expand your grilling possibilities, offering durability and ease of use. The cast-iron griddle is a popular choice for searing vegetables, pancakes, and burgers, while the non-stick griddle provides a scratch-resistant surface for delicate foods. Both options are dishwasher-safe, making cleanup effortless. Additionally, the grill supports a variety of accessories, such as carrying cases, utensil holders, and drip trays, which enhance portability and convenience. These accessories are designed to fit seamlessly with your RoadTrip Grill, ensuring a seamless cooking experience. Whether you’re camping or hosting a backyard gathering, the griddles and accessories allow you to explore diverse cooking techniques and maintain your grill’s performance over time.
8.3 Carrying Cases
Coleman RoadTrip Grills come with durable carrying cases designed for easy transport and storage. Made from heavy-duty materials like nylon, these cases protect your grill during trips to campsites, tailgating events, or backyard gatherings. The carrying case is tailored to fit the grill’s compact, folded design, ensuring a snug and secure fit. Features include reinforced handles for comfortable carrying and internal padding to prevent damage. The case also has additional storage pockets for small accessories like utensils or cleaning supplies. This convenient accessory enhances the portability of your RoadTrip Grill, making it simple to take wherever adventure calls. By keeping your grill safe and organized, the carrying case helps maintain its condition and prolongs its lifespan.
Model-Specific Instructions
Discover tailored guidance for the Coleman RoadTrip 285, including unique assembly steps and feature-specific tips to maximize your grilling experience with this portable propane grill.
9.1 Coleman RoadTrip 285 Instructions
The Coleman RoadTrip 285 is a portable propane grill designed for versatility and convenience. Its assembly requires careful attention to the provided manual, ensuring all components are securely fitted.
Once assembled, the grill operates efficiently with a reliable ignition system and adjustable temperature controls. For optimal performance, preheat the grill for 10-15 minutes before cooking.
Cleaning is essential after each use to maintain hygiene and longevity. Regularly check and replace parts like burner tubes and heat shields as needed.
Store the grill in a dry, protected area when not in use to prevent damage. Follow the manual’s specific guidelines for troubleshooting common issues.
With proper care, the Coleman RoadTrip 285 delivers consistent grilling results, making it ideal for camping, picnics, or small outdoor gatherings.

Warranty Information
Coleman offers a limited 1-year warranty for the RoadTrip grill, covering manufacturing defects in materials and workmanship. For warranty claims, contact Coleman’s customer service with proof of purchase.
The warranty does not cover damage caused by misuse, neglect, or normal wear and tear. Replacement parts and repairs are provided at Coleman’s discretion.
To ensure warranty validity, register your grill on Coleman’s official website within 30 days of purchase. Keep the original receipt and serial number for verification.
For international customers, warranty terms may vary based on regional policies. Always refer to the official Coleman website for the most accurate and updated warranty information.
Frequently Asked Questions
Here are some common questions about the Coleman RoadTrip Grill:
Why won’t my grill ignite? Check propane flow, ensure the tank is not empty, and clean the igniter and burner holes.
Can I use my grill in the rain? Avoid use in heavy rain to prevent damage to electrical components.
How do I clean the grill properly? Use a wire brush and mild soap; avoid harsh chemicals.
What is the warranty period? The grill is covered by a 1-year limited warranty.
Can I replace parts myself? Yes, but only use Coleman-approved parts to maintain warranty validity.
Why is my grill not heating evenly? Check for food debris and ensure the grill is preheated properly.
Are swappable cooktops compatible with my model? Yes, check Coleman’s official website for compatible accessories.
These FAQs address common concerns to help you enjoy your grilling experience.